Eclipse Android FAQ: How to set up the Eclipse Android development environment, including the Eclipse ADT and Android SDK.
After a little digging around I figured out how to install an Eclipse Android development environment, and I thought I'd share my installation notes here. The notes are a little shorter than my usual detailed explanations, but hopefully they're long enough.
To get the Android development environment working with Eclipse, you need to install two components onto your development system:
- The Eclipse Android Developer Tools (ADT)
- The Android SDK
The Eclipse Android Developer Tools are Android development tools specifically created for the Eclipse IDE. The Android SDK is a set of command line tools that comes from Google. You'll need both of these to develop Android applications with Eclipse.
Assuming you already have Eclipse installed, here's a short look at how to install/setup your Eclipse Android development environment.
Install Eclipse Android Developer Tools (ADT)
Installing the Eclipse Android Developer Tools (ADT) is very similar to installing other Eclipse add-ons. Here's a quick look at the installation steps required, with a few screen captures along the way.
1) Start Eclipse.
2) Click the Help menu item, then Install New Software.
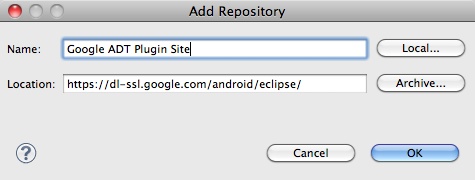
3) Add the Google ADTP plugin site (https://dl-ssl.google.com/android/eclipse/) to Eclipse:
The Android Eclipse ADT plugin site.
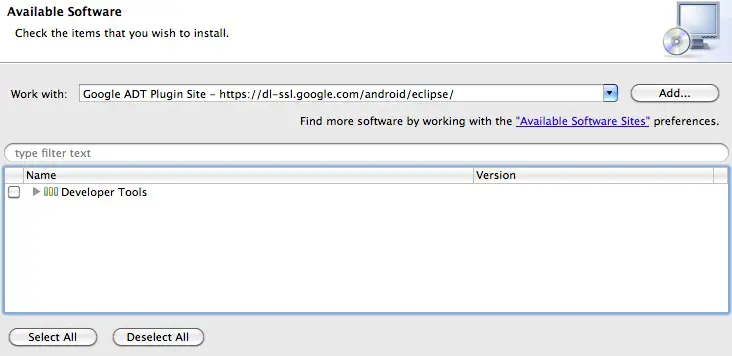
After adding the Android ADT plugin site to Eclipse.
4) Select "Developer Tools" (described as "Features that add Android support to Eclipse for application developers.")
5) Click Next. Review the on-screen docs, and click Next.
6) After you review the licenses there is an Install option, click that:
7) The Android Eclipse plugin (ADT) is installed.
8) Restart Eclipse when you're prompted to.
Your Eclipse Android development is now installed, but you still need to install the Android SDK. We'll do that next.
Install the Android SDK
1) To begin installing the Android SDK, first download it from the Android SDK developer download page.
2) Once you've downloaded the SDK, expand it to a directory.
3) Next, rename the directory as desired (or leave it with the default name it comes as). On my Mac system I renamed the directory so it would be located here:
/Users/al/tools/android-sdk
4) Add the directory to your PATH, something like this on a Mac or Linux system:
PATH=$PATH:/Users/al/tools/android-sdk
5) From the android-sdk roo directory, run this command to update your Android SDK installation:
tools/android update sdk
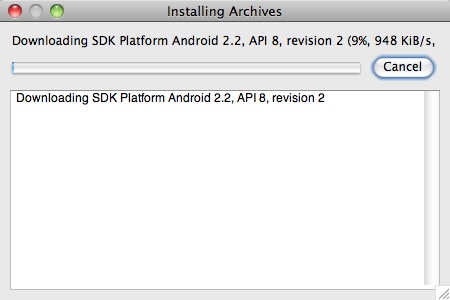
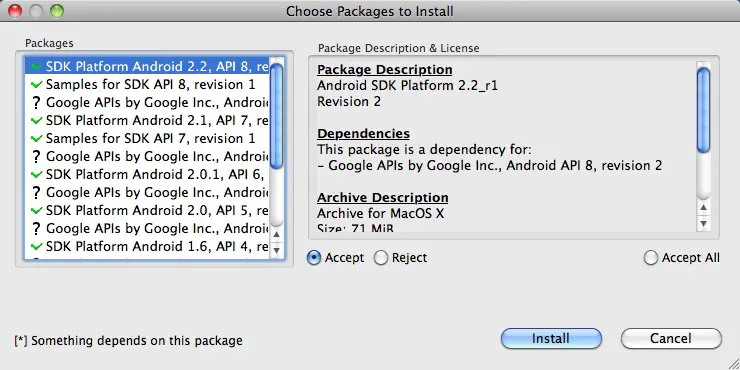
6) This brings up the Android SDK GUI, and the update process takes a little while to update itself:
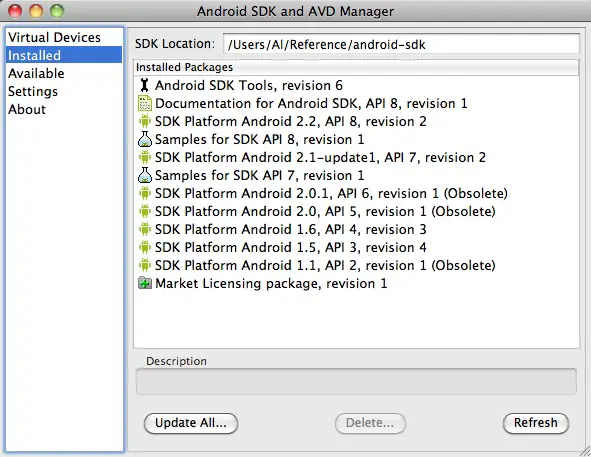
While the Android SDK is updating itself, you can read a file named "SDK Readme.txt", which describes the Android SDK update process like this:
The Android SDK archive now only contains the tools. It no longer comes populated with a specific Android platform or Google add-on. Instead you use the SDK Manager to install or update SDK components such as platforms, tools, add-ons, and documentation.
In order to start developing applications, you must install at least one version of the Android platform using the SDK Manager. This requires an Internet connection, so if you plan to use the SDK offline, please make sure to download the necessary components while online.
To start the SDK Manager, please execute the program "tools/android". From the command-line you can also directly trigger an update by executing:
tools/android update sdkFor more information, please consult the Android web site at http://developer.android.com
Once this this Android SDK update process is complete, you'll be ready to start developing Android applications in Eclipse.
I'll tackle a first "Hello, world" Eclipse Android project in a future article.
books by alvin
 |
 |
 |
 |