I recently learned how to use the Java javapackager command to build a macOS application bundle — i.e., a regular macOS application — from a Java application. In this tutorial I’ll show how to create a Mac application bundle from a simple Java class, in this case a Java Swing class.
Building a MacOS application bundle with javapackager
The short story of how to build a macOS application bundle using javapackager in this project is to use these steps.
First, clone my Github project onto your macOS system:
Next, move into that directory. To compile and run the project, run these commands:
- Compile the Java class with
./1compile.sh - Create a JAR file from the *.class files and manifest with
./2makeJar - Build the Mac application bundle with
./3build
Assuming that everything works as it should, you can then run the newly-built application using this command:
open release/bundles/MacJavaProperties.app/
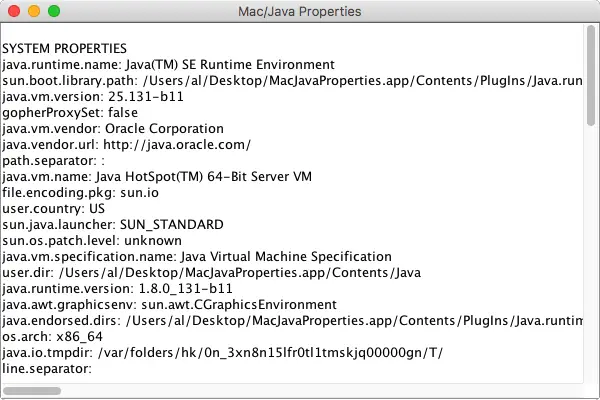
When you run the application like this, you should see the following Mac/Java application open up:
The longer story
For the longer version of the story, read on ...
The Mac/Java class
I named the Java class file MacJavaPropertiesApp.java, and its source code looks like this:
import java.awt.BorderLayout;
import java.awt.Dimension;
import javax.swing.JEditorPane;
import javax.swing.JFrame;
import javax.swing.JScrollPane;
import javax.swing.JTextArea;
import javax.swing.SwingUtilities;
import javax.swing.text.Document;
import javax.swing.text.html.HTMLEditorKit;
import javax.swing.text.html.StyleSheet;
import java.util.Map;
import java.util.Properties;
import java.util.Enumeration;

public class MacJavaPropertiesApp {

    public static void main(String[] args) {
        new MacJavaPropertiesApp();
    }

    public MacJavaPropertiesApp() {
        SwingUtilities.invokeLater(() -> {

            // system properties
            String s = "\nSYSTEM PROPERTIES\n";
            Properties p = System.getProperties();
            Enumeration keys = p.keys();
            while (keys.hasMoreElements()) {
                String key = (String)keys.nextElement();
                String value = (String)p.get(key);
                System.out.println(key + ": " + value);
                s = s + key + ": " + value + "\n";
            }

            // environment variables
            s = s + "\n\nENVIRONMENT VARIABLES\n";
            Map<String, String> env = System.getenv();
            for (String envName : env.keySet()) {
                s = s + "\n";
                s = s + envName + ": " + env.get(envName);
            }

            JTextArea textArea = new JTextArea();
            textArea.setText(s);
            JScrollPane scrollPane = new JScrollPane(textArea);

            JFrame frame = new JFrame("Mac/Java Properties");
            frame.getContentPane().add(scrollPane, BorderLayout.CENTER);
            frame.setDefaultCloseOperation(JFrame.EXIT_ON_CLOSE);
            frame.setSize(new Dimension(600, 400));
            frame.setLocationRelativeTo(null);
            frame.setVisible(true);
        });
    }

}
The three scripts
The first script is named 1compile.sh, and here’s its source code:
javac MacJavaPropertiesApp.java
echo "compiled MacJavaPropertiesApp.java"
The second script is named 2makeJar, and here’s its source code:
jar cmf manifest MacJavaPropertiesApp.jar *.class
echo "created MacJavaPropertiesApp.jar from MacJavaPropertiesApp.java and manifest"
The third script is named 3build. It contains the javapackager command, and here’s its source code:
# SEE https://docs.oracle.com/javase/8/docs/technotes/tools/unix/javapackager.html

JAVA_HOME=`/usr/libexec/java_home -v 1.8`
APP_DIR_NAME=MacJavaProperties.app

#-deploy -Bruntime=/Library/Java/JavaVirtualMachines/jdk1.8.0_131.jdk/Contents/Home \
javapackager \
  -deploy -Bruntime=${JAVA_HOME} \
  -native image \
  -srcdir . \
  -srcfiles MacJavaPropertiesApp.jar \
  -outdir release \
  -outfile ${APP_DIR_NAME} \
  -appclass MacJavaPropertiesApp \
  -name "MacJavaProperties" \
  -title "MacJavaProperties" \
  -nosign \
  -v

echo ""
echo "If that succeeded, it created \"release/bundles/${APP_DIR_NAME}\""
Note that the -appclass setting should refer to the full path of the main class, such as com.acme.MyApp. In this case I didn’t put the main class in a package, so I didn’t have to specify that information.
javapackager notes
There are about 100 things I could say about the javapackager command, but here are a few notes:
- I don’t specify an application icon, but you declare one with
icon=path - If you want to sign your application, that takes much more work, including needing an Apple developer account, and generating certificates
- You can also specify JVM options and Mac-specific options
Those are the first things that come to mind. I’ll add more notes as I think about them.
One final note: This is intended to be a relatively simple javapackager example. As I mentioned, there are many, many more things to say about it, but this example shows how to create a macOS application bundle from Java source code, which is what I wanted to show today. (More complicated examples will have multiple JAR files, application resource files, etc.)
A “Production” javapackager script
As a note to self, I used this javapackager script on a Production application for a client:
#!/bin/sh

# purpose: this script creates a signed ".app" application directory for the
#          ACME application
#
# known assumptions for this script:
#   - the application jar files are in the 'lib' directory
#   - the icon file is in the current directory
#   - the necessary resource files are in the 'resources' directory (.ini, etc.)
#   - the necessary apple certificates are installed on the Mac this script is run on
#
# see this URL for details about the `javapackager` command:
# https://docs.oracle.com/javase/8/docs/technotes/tools/unix/javapackager.html

# necessary variables
JAVA_HOME=`/usr/libexec/java_home -v 1.8`
RELEASE_DIR=release
APP_DIR_NAME=ACME.app

# javapackager command notes:
#   - `-native image` creates a ".app" file (as opposed to DMG or other)
#   - `-name` is used as the app name in the menubar if you don't specify "-Bmac.CFBundleName"
#   - oracle notes says "use cms for desktop apps"
#   - `v` is for verbose mode. remove it if you don't want/need to see all of the output

# (1) create and sign the ".app" directory structure. this command creates the
#     "./release/bundles/ACME.app" directory.
javapackager \
  -deploy -Bruntime=${JAVA_HOME} \
  -native image \
  -outdir ${RELEASE_DIR} \
  -outfile ${APP_DIR_NAME} \
  -srcdir . \
  -srcfiles lib \
  -appclass AcmeMain \
  -name "ACME" \
  -title "ACME" \
  -vendor "ACME, LLC" \
  -Bicon=ACME.icns \
  -Bmac.CFBundleVersion=1.0 \
  -Bmac.CFBundleIdentifier=com.ACME.AcmeMain \
  -Bmac.category=Education \
  -BjvmOptions=-Xms128m \
  -BjvmOptions=-XX:+UseConcMarkSweepGC \
  -BjvmOptions=-XX:ParallelCMSThreads=2 \
  -BjvmOptions=-XX:PermSize=20m \
  -BjvmOptions=-XX:MaxPermSize=20m \
  -BjvmOptions=-Dapple.laf.useScreenMenuBar=true \
  -BjvmOptions=-Dcom.apple.smallTabs=true \
  -Bmac.signing-key-app="3rd Party Mac Developer Application: ACME LLC (69MA88JZ99)"   \
  -Bmac.signing-key-developer-id-app="Developer ID Application: ACME LLC (69MA88JZ99)" \
  -v

# (2b) copy *all* resource files into the ".app" directory
#cp -R resources/ ${RELEASE_DIR}/bundles/${APP_DIR_NAME}/Contents/Java/
The real name wasn’t ACME. :)
books by alvin
 |
 |
 |
 |