If you’d like an example of how to create a data entry form using the Play Framework v2.6, here’s a complete example.
Define the routes
First, add these entries to your routes file:
GET  /posts/add   controllers.BlogPostController.add
POST /posts/save  controllers.BlogPostController.save
Create a controller
Next, create this BlogPostController in your app/controllers directory:
package controllers

import javax.inject.Inject
import play.api.mvc._
import play.api.data._
import play.api.data.Forms._
import scala.collection.mutable.ArrayBuffer

case class BlogPost (
    title: String,
    category: String,
    body: String,
    tagsAsString: String,
    metaDescription: String,
    uri: String
)

class BlogPostController @Inject()(cc: MessagesControllerComponents)
extends MessagesAbstractController(cc) {

    private val logger = play.api.Logger(this.getClass)

    // simulated database
    private val blogPosts = ArrayBuffer[BlogPost]()

    val form: Form[BlogPost] = Form (
        mapping(
            "title" -> nonEmptyText,
            "category" -> nonEmptyText,
            "blogContent" -> nonEmptyText,
            "tags" -> nonEmptyText,
            "description" -> nonEmptyText,
            "uri" -> nonEmptyText
        )(BlogPost.apply)(BlogPost.unapply)
    )

    private val mainPostUrl = routes.BlogPostController.save()

    def add = Action { implicit request: MessagesRequest[AnyContent] =>
        // pass an unpopulated form to the template
        Ok(views.html.editBlogPost(form, mainPostUrl))
    }

    def save = Action { implicit request: MessagesRequest[AnyContent] =>
        val errorFunction = { formWithErrors: Form[BlogPost] =>
            logger.debug("CAME INTO errorFunction")
            // this is the bad case, where the form had validation errors.
            // show the user the form again, with the errors highlighted.
            BadRequest(views.html.editBlogPost(formWithErrors, mainPostUrl))
        }

        val successFunction = { data: BlogPost =>
            logger.debug("CAME INTO successFunction")
            // this is the SUCCESS case, where the form was successfully parsed as a BlogPost
            val blogPost = BlogPost(
                data.title,
                data.category,
                data.body,
                data.tagsAsString,
                data.metaDescription,
                data.uri
            )
            logger.debug(blogPost.toString)
            blogPosts.append(blogPost)
            Redirect(routes.BlogPostController.add()).flashing("info" -> "Blog post added (trust me)")
        }

        val formValidationResult: Form[BlogPost] = form.bindFromRequest
        formValidationResult.fold(
            errorFunction,   // sad case
            successFunction  // happy case
        )
    }

}
Notice that the controller code includes a case class to work with the form, and the definition of a Form and a form mapping, in addition to the necessary controller methods. The add and save methods in this class correspond to the routes entries of the same names.
Create the template/form
Now add this editBlogPost.scala.html file to your app/views directory:
@(form: Form[BlogPost], postUrl: Call)(implicit request: MessagesRequestHeader)

@main("Blog Post") {

    <h1>Blog Post</h1>

    @* Flash shows updates to a page *@
    @request.flash.data.map{ case (name, value) =>
        <div>@name: @value</div>
    }

    @* Global errors are not tied to any particular form field *@
    @if(form.hasGlobalErrors) {
        @form.globalErrors.map { error: FormError =>
            <div>
                Error: @error.key: @error.message
            </div>
        }
    }

    @* “'id” in these elements is the css `id` field that will be shown *@
    @helper.form(postUrl, 'id -> "blog_edit_form") {
        @helper.CSRF.formField

        @helper.inputText(form("title"), 'id -> "title", 'size -> 60)
        @helper.inputText(form("category"), 'size -> 60)
        @helper.textarea(form("blogContent"), 'rows -> 5, 'cols -> 60)
        @helper.inputText(form("tags"), 'size -> 60)
        @helper.inputText(form("description"), 'size -> 60)
        @helper.inputText(form("uri"), 'size -> 60)

        <button>Save</button>
    }

}
This code doesn’t do anything with a database, so that’s all the code you need.
What the form looks like
Now go to the http://localhost:9000/posts/add URL in your browser and you should see a new Play Framework data entry form that looks like this:
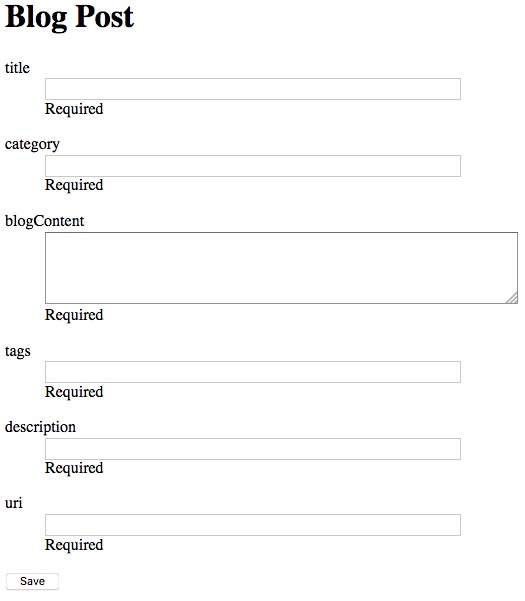
Of course that needs some CSS styling, but that’s what it looks like out of the box.
I’m not going to take the time to explain this code because the Play Framework form documentation is very good, but if you needed to see an example of a Play data entry form I hope this is helpful.
Play form input helpers
As a note to self, this is a list of Play Framework form input helpers:
@* note: other input helpers *@
form:            form element
inputText:       text input element
inputPassword:   password input element
inputDate:       date input element
inputFile:       file input element
inputRadioGroup: radio input element
select:          a select element (select/option)
textarea:        a textarea element
checkbox:        a checkbox element
input:           a generic input element (which requires explicit arguments)
See the Play Framework forms documentation for more information on input helpers, form mapping constraints, and other details.
Form resources
Here are a couple of Play Framework form resources, some of which are helpful but hard to find:
books by alvin
 |
 |
 |
 |