Table of Contents
- The raw, initial image
- Beautify (SmartColor + Contrast)
- Beautify(SmartColor+Contrast) + Oilify
- Beautify/(SmartColor+Contrast) + SelectZeus/Invert/GaussianBlurBG
- Second Gaussian Blur on background
- De-saturate the background color
- Selecting with the “Lasso” tool (transparent background)
- Beautify > Art > Sketch
- Beautify > Art > Life Sketch
- Blur > Blur > Oilify
- Blur > Pixelize(2) > Oilify
- Blur > Smartcolor (repeat)
- Blur > Smartcolor (repeat) > Oilify
- Spread (5)
- Pick (70)
- Artistic > Oilify > Canvas (3)
- Artistic > Oilify > Canvas (2)
- Artistic > Oilify > Canvas (2) > Simple Border (11)
- [SmartColor+Oilify] vs [SmartColor+Oilify+SmartColor]
- Borders outside of Gimp (Easy Frame)
- Summary/Conclusion
In a previous article I shared a catalog of examples of Gimp filter effects. In this brief pictorial I’ll share examples of some of my favorite Gimp effects on a favorite image of a favorite dog. I don’t have a particular goal in this work, I just want to try out some different filters and effects and see where they lead.
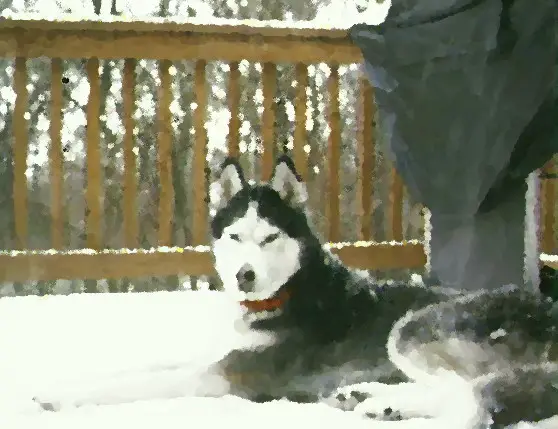
The raw, initial image
Here’s a raw image of a Siberian Husky named Zeus that I knew very well:
.
.
.
(this space left blank for that long table of contents over there -->)
.
.
.

(If you’re interested, you can read much more about Zeus.)
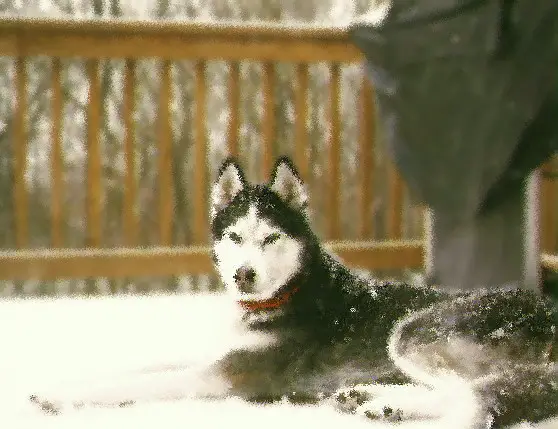
Beautify (SmartColor + Contrast)
That image was taken about 10-12 years ago, so I immediately go to the Beautify > Smart Color and Beautify > Contrast filters to make the color a little more accurate. I think I did the Smart Color effect at 90% and the Contrast at 10-20%:

You can see that the colors are much better already.
Beautify(SmartColor+Contrast) + Oilify
I like the Artistic > Oilify filter, and usually check it out early:
Beautify/(SmartColor+Contrast) + SelectZeus/Invert/GaussianBlurBG
Next, I back up and undo the Oilify filter, select Zeus with the Lasso tool, then invert the selection and apply a Gaussian blur to the background:

Notice that Zeus is sharp and the background is now blurry.
Second Gaussian Blur on background
Next, I increase the effect by applying the Gaussian Blur effect again:

De-saturate the background color
Out of curiousity I de-saturate the background color:

That can be a really nice effect for some photos.
Selecting with the “Lasso” tool (transparent background)
FWIW, when I say I use the “Lasso” tool, this is the tool that lets you select something in an image using a single freehand drawing stroke, a series of small lines, or a combination of the two. For instance, when I select Zeus with the Lasso tool, invert the selection, and then clear the background, this is what is left:
![]()
You can also take that a step further by converting the image to make the background transparent. After you select what you want — Zeus, in this case — invert the selection as usual (Select > Invert), choose the Layer menu, then Transparency, then Add Alpha Channel. Then when you choose Edit > Clear to clear the background, you’ll have Zeus alone with a transparent background, like this:
![]()
Be sure to save that image as a PNG file, as JPG files don’t support transparency.
Now that you have the selection with a transparent background, you can put it wherever you’d like, such as Homer, Alaska:

At the cabin in Talkeetna:

Or in front of Nagleys on MainStreet in Talkeetna:

Beautify > Art > Sketch
Next, I undo that last step, then check out the Beautify > Art > Sketch filter:

Beautify > Art > Life Sketch
Then I undo that and check out the Beautify > Art > Life Sketch filter:

I like that image quite a bit.
Blur > Blur > Oilify
At this point I undo everything until I’m back to the second Gaussian Blur effect on the background. The way I named the file indicates that I blurred the entire image with Blur > Blur, then applied Artistic > Oilify:

Blur > Pixelize(2) > Oilify
Sometimes it looks better if you do a Blur > Pixelize before Oilify:
![]()
In this case I prefer the image without the pixelize effect, but they’re both good.
Blur > Smartcolor (repeat)
Again I back up to the second Gaussian Blur image and then repeat the Beautify > Smart Color application:

Blur > Smartcolor (repeat) > Oilify
Now the color really pops, and I apply the Oilify effect again:

Spread (5)
Out of curiousity I undo that and try the Noise > Spread effect:
Pick (70)
Then I undo that and try the Noise > Pick effect:

I like both of those images as well.
Artistic > Oilify > Canvas (3)
As mentioned, I usually like the Oilify effect, so I go back to my last Oilify version, then apply Artistic > Canvas, with three pixels for the canvas:

Artistic > Oilify > Canvas (2)
Then I do the same thing, but with only two pixels on the canvas:

Artistic > Oilify > Canvas (2) > Simple Border (11)
In this next version I take the last image and apply 11th Simple Border effect:

[SmartColor+Oilify] vs [SmartColor+Oilify+SmartColor]
Backing up for a moment ... in these next two images you can see what a difference it makes to go back to the Beautify > Smart Color option again. The first image has one Smart Color application, the second image has two Smart Color applications. Both have had the Artistic > Oilify filter applied.
In this case I prefer the second image, but it doesn’t always work out that way.
Borders outside of Gimp (Easy Frame)
At this point I’m finished demonstrating some of what you can do with Gimp. For the rest of the images I’m going to try some different borders with a Mac OS X application named Easy Frame.
This is the “Spatter3” border from Easy Frame:

This is Spatter6:

This is Spatter11:

This is Fuzzy2:

This is Sloppy3:

This is Sloppy8:

As you can see, different frames give the image a different feel or emotion.
Summary/Conclusion
I’ll write more about this in the future, and possibly add some more images to show different effects, but for now, if you wanted to see a variety of Gimp effects applied to one image, I hope these examples have been helpful.
One thing I’ll note: If I’m working on something for public consumption, such as a book cover or business logo, I will easily create 200-500 versions of an image, letting each filter or effect take me where it will. (As just one example, I created over 200 versions of several different logos before settling on the final logo for my Valley Programming business.) In this case I created “just” 20-25 versions of this image.
books by alvin
 |
 |
 |
 |
