Android Eclipse FAQ: How do I create a new Android Virtual Device (AVD) emulator I can use in Eclipse?
There are at least two ways to create a new Android Virtual Device you can use in Eclipse: (a) Using the Eclipse Android GUI, and (b) using the Android command line.
How to create an AVD in Eclipse
Assuming your Android Eclipse work environment is set up properly, creating a new Android Virtual Device (AVD) is simple. Just follow these steps.
1) In Eclipse, click the Window menu, then click Android SDK and AVD Manager.
2) On the Android SDK and AVD Manager dialog that pops up, you'll see a list of any Android AVDs you have already created:
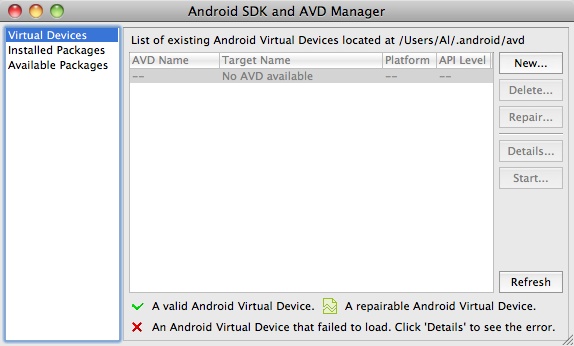
Just click the "New..." button here to start creating a new AVD.
3) On the "Create new Android Virtual Device" dialog, just choose the options you want for your Android virtual device emulator, as shown here:
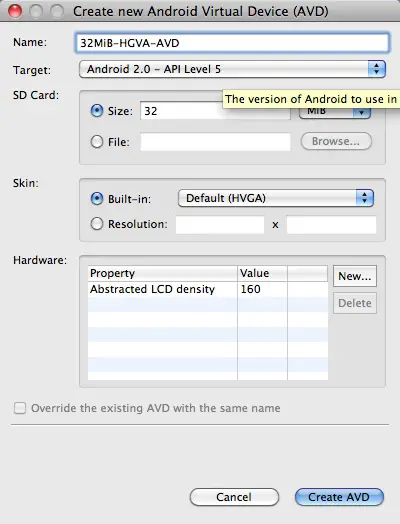
After filling out all the parameters, just click the "Create AVD" button, and your new AVD will be created, and it will appear in the list of Android Virtual Devices in the previous dialog, like this:
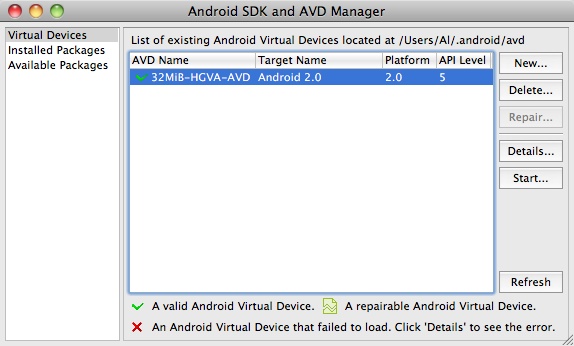
You can now use this AVD in your Eclipse/Android development projects.
The AVD directory
One important thing to note here: Your Android Virtual Devices will be created in a directory named ".android" in your home directory. As you can see, on my Mac these devices are created in this directory:
/Users/Al/.android/avd
If you work from the command line, it can be very helpful to know this location.
Create an Android Virtual Device from the command line
You can also create an AVD from the command line. Assuming you have the Android SDK installed properly on your computer, the command to create a new AVD from the command line looks like this:
android create avd -n 64MiB-HGVA-AVD -t 4 -c 64M
After issuing this command, and answering 'no' to the subsequent prompt, you should see some output like this:
Android 2.0 is a basic Android platform.
Do you wish to create a custom hardware profile [no]
Created AVD '64MiB-HGVA-AVD' based on Android 2.0,
with the following hardware config:
hw.lcd.density=160
Now, if you go back into Eclipse, if you display the Android SDK and AVD Manager dialog again, you'll see this new device in your list of AVDs as well:
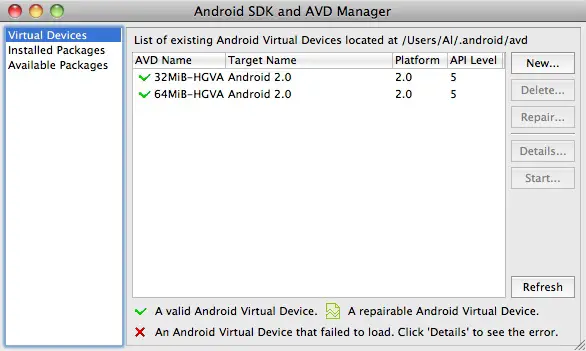
Note that you can also see this same Android SDK and AVD Manager by typing "android" (with no arguments) from the command line.
books by alvin
 |
 |
 |
 |