|


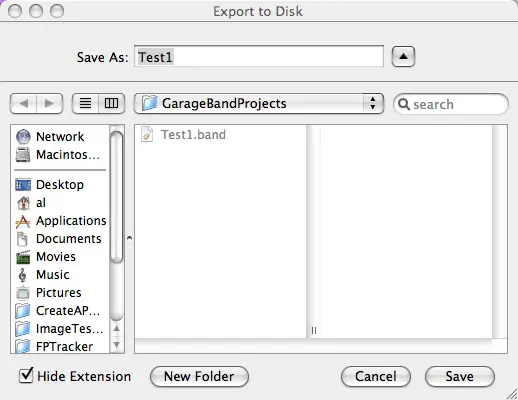
Step 8: Export your GarageBand podcast to a fileImagine that you've now created a podcast that you want to share with your friends and family. You can do this very easily with GarageBand. Just select the "share" menu item and select the "Export podcast to disk" option. This brings up the "Export to disk" dialog, and will initially start in your "GarageBandProjects" folder. To save your podcast here, type in your desired filename, leaving off the filename extension, and then press the Save button. As an example, my dialog is shown in Figure 7.
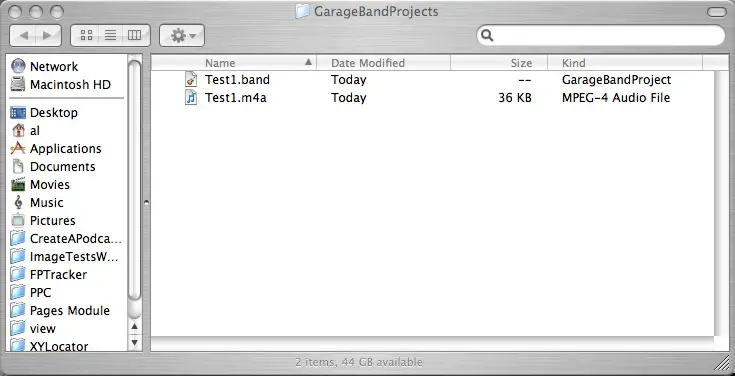
When you do this you'll see GarageBand show one or more progress bars as it works to export your file. When it's finished exporting your file it does not provide a success indicator, it simply returns you to the main GarageBand screen. To test your file, open up a Finder window and navigate to your GarageBandProjects folder. This is going to be a folder in your home directory, so open a Finder window, go to your home directory, and then look for a folder named "GarageBandProjects". When you get to that folder your new file should be there. If the Finder is set up to show filename extensions you'll also see the extension "m4a" on the end of your file, or if it's set up to show files in columns, the "Kind" column will show that this file is an "mpg4 audio file". This is a compressed file format that can be used by several software applications, including iTunes. My Finder folder is shown in Figure 8.
|