I recently needed to make an icon look like an iOS style app icon -- a rounded rectangle with transparent corners -- and to do that I needed to learn how to create a rounded rectangle in Gimp. This tutorial contains a short step-by-step description of how to do this.
Note: I wrote this tutorial in April, 2015, using Gimp 2.8.
Create an image
To get started you’ll need an image to work with. If you don’t have an image to work on, start with these steps to create an initial image:
- Start the Gimp.
- Create a new image. If you’re creating a mobile app icon, make it a square, something like 1024x1024.
- Do whatever you want to the image here. For instance, add colors to it, and center your app icon in the middle of it.
Convert it into a rounded rectangle image
Now that you have an image to work with, you’ll convert that image to a rounded rectangle with Gimp, where the edges of the rectangle will be transparent:
- Add transparency to the image. For the purposes of this tutorial I’ll assume that you have only one layer in your image, so click Layer > Transparency > Add Alpha Channel. (More on this shortly.)
- Click Select > All.
- Click Select > Rounded Rectangle. When the dialog appears, choose a percentage. Apple iOS icons use about 42%. Click OK.
- Click Select > Invert. This changes the selection from “everything inside the rounded rectangle” to “everything outside the rounded rectangle.”
- Click Edit > Clear. At this point you should have a nice rounded rectangle image.
- Export your image as a PNG file, and also save your work as an XCF file (assuming that you may want to work on it more in the future.)
I just followed those instructions and created this exciting rounded rectangle image:
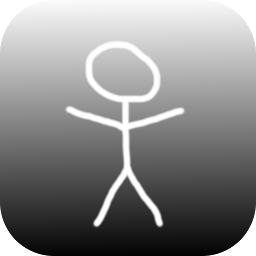
(I hope you like that image, it’s an original. :)
About the “transparency” step
The step of adding transparency to your image can be a little more complicated than what I described if your image has multiple layers, so I’ll add a few notes about that.
First, even when I have multiple layers in an image -- which is about 95% of the time -- I usually only have one layer that fills the entire image, especially if I’m working on an app icon. In this situation, select the layer whose image fills the entire area, then click Layer > Transparency > Add Alpha Channel. That might be enough for you, but again, this can be a little tricky, depending on where your layers are with respect to the four corners of the image.
If that approach doesn’t work, flatten the layers of your image into one layer with the “Merge Down” technique. (Right-click the top layer in your list of layers, click “Merge Down”, and keep repeating that step.) Once you have just one layer, you can click Layer > Transparency > Add Alpha Channel as described originally.
There are other variations of what you can do here depending on your particular image, how many layers it has, and where those layers are positioned, but hopefully that’s enough to get you started in the right direction.
Summary
In summary, if you wanted to see how to create a rounded rectangle in Gimp, I hope this tutorial has been helpful.
books by alvin
 |
 |
 |
 |