In this final, third part of my three-part introductory series on Scala.js I’ll demonstrate a technique that can help you build single-page web applications with Scala.js. That is, the body of your HTML page will look like this:
<body>
    <div id="root"></div>

    <script type="text/javascript" src="./target/scala-2.12/scala-js-hello-world-jsdeps.js"></script>
    <script type="text/javascript" src="./target/scala-2.12/scala-js-hello-world-fastopt.js"></script>
</body>
After that, your entire application will then be written in Scala/Scala.js, which is converted into JavaScript code in the scala-js-hello-world-fastopt.js file.
Note: Before moving on, if you haven’t read my previous tutorials in this series, you can find them here:
Single-page applications
As an extraordinarily brief introduction, if you don’t know what Single-Page Applications (SPA) are, go to a website like Facebook or Gmail, then right-click and select View Source. On Facebook you’ll see something like this:
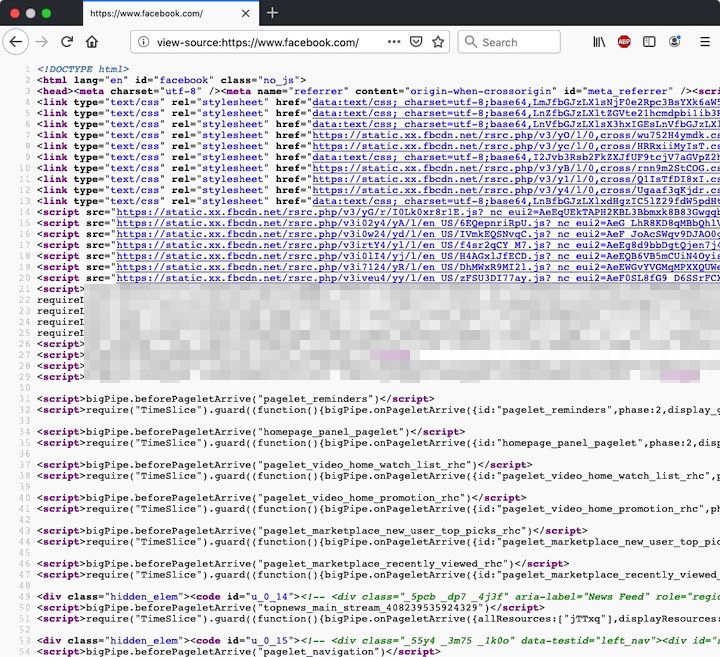
For the most part all you see is a lot of JavaScript, with remarkably little HTML. In essence, everything you see on Facebook or Gmail is generated from JavaScript code. You go to facebook.com, mail.google.com, maps.google.com, etc., and then a lot of JavaScript is loaded into your browser, and the application is rendered inside your browser.
In this tutorial I’ll show you how to get started down the road of creating SPAs with Scala.js. I won’t take you too far, but I’ll get you through the initial hurdles, and where you go from there is up to you.
1. Getting started (dependencies)
To get started on the tutorial, I’m going to use a library named Scalatags, which was created by Li Haoyi. To use it, add this line to your build.sbt file:
libraryDependencies += "com.lihaoyi" %%% "scalatags" % "0.6.7"As I mentioned in the earlier tutorials, notice that the dependency is declared with three % symbols:
libraryDependencies += "com.lihaoyi" %%% "scalatags" % "0.6.7"
                                     ---
You use three % symbols to add libraries that were create specifically for Scala.js.
While I’m in the build.sbt neighborhood, we’re going to create a new Hello3.scala file for this tutorial, so change the mainClass setting to refer to the Hello3.scala file we’ll be creating shortly:
mainClass in Compile := Some("hello.Hello3")With all of the changes I’ve made to the build.sbt file in these three tutorials, your build.sbt file should look like this:
name := "Scala.js Hello World"
version := "1.0"
scalaVersion := "2.12.8"                      // or any other Scala version >= 2.10.2

// ScalaJS
scalaJSUseMainModuleInitializer := true       // this is an application with a main method
mainClass in Compile := Some("hello.Hello3")  // must be Hello3 for this tutorial
enablePlugins(ScalaJSPlugin)

// DOM
libraryDependencies += "org.scala-js" %%% "scalajs-dom" % "0.9.7"

// jQuery
libraryDependencies += "org.querki" %%% "jquery-facade" % "1.2"
skip in packageJSDependencies := false
jsDependencies += "org.webjars" % "jquery" % "2.2.1" / "jquery.js" minified "jquery.min.js"

// Li Haoyi Scalatags project
libraryDependencies += "com.lihaoyi" %%% "scalatags" % "0.6.7"
The jQuery dependencies aren’t necessary for this tutorial, but I added it during the last tutorial, and you may want them if you decide to decide to build your own SPAs using Scala.js. (Also, if you’re not going to use jQuery, the it’s not necessary to import the scala-js-hello-world-jsdeps.js file into your HTML page.)
2. Create hello3.html
Next, create a hello3.html file in the project’s root directory with these contents:
<!DOCTYPE html>
<html>

<head>
    <meta charset="UTF-8">
    <title>Scala.js — Hello, world, Part 3</title>
</head>

<body>
    <div id="root"></div>

    <!-- important that jsdeps is first -->
    <script type="text/javascript" src="./target/scala-2.12/scala-js-hello-world-jsdeps.js"></script>
    <script type="text/javascript" src="./target/scala-2.12/scala-js-hello-world-fastopt.js"></script>
</body>
</html>
The big change from hello2.html to hello3.html is the removal of the HTML button and the addition of this code:
<div id="root"></div>You’ll use this root id in the Scala code we’ll create next. (Notice how little HTML is in this “HTML” file!)
3. Create Hello3.scala
Next, create a Scala source code file named Hello3.scala in the src/main/scala/hello directory with these contents:
package hello

import org.scalajs.dom
import dom.document
import scalatags.JsDom.all._

object Hello3 {

    def main(args: Array[String]): Unit = {

        val btn = button(
            "Click me",
            onclick := { () =>
                dom.window.alert("Hello, world")
        })

        // intentional overkill to demonstrate scalatags
        val content =
            div(cls := "foo",
                div(cls := "bar",
                    h2("Hello"),
                    btn
                )
            )

        val root = dom.document.getElementById("root")
        root.innerHTML = ""
        root.appendChild(content.render)

    }

}
Here’s a quick description of this code. First, I create a Scalatags button. The button label is Click me, and when it’s clicked I show a JavaScript alert window, similar to what I did in the previous tutorial:
val btn = button(
    "Click me",
    onclick := { () =>
        dom.window.alert("Hello, world")
})
Next, just to demonstrate how Scalatags works, I create a div with the class name foo, then put another div inside it with the class name bar, then put an h2 element and the button inside those two divs:
val content =
    div(cls := "foo",
        div(cls := "bar",
            h2("Hello"),
            btn
        )
    )
Again, this isn’t necessary — I’m just doing it to demonstrate how Scalatags works. One thing I like about Scalatags is how this Scala code corresponds so well to the HTML code it’s going to emit. Another great thing is that Scalatags is supported by your IDE, so the code-completion feature of your IDE is a great help in figuring out how to use Scalatags.
(Note: Those classes should probably be id’s. I just noticed that mistake as I was publishing this.)
Finally, I connect my Scala.js/Scala/Scalatags code to the root element of my HTML web page with this code:
val root = dom.document.getElementById("root")
root.innerHTML = ""
root.appendChild(content.render)
If you’re familiar with working with the DOM with JavaScript, this code probably looks familiar. One important note is that you need to remember to call the render method on your Scalatags code to make this work:
root.appendChild(content.render)
                         ------
In my experiments I tend to forget that part, so it’s worth mentioning it.
4. Run the code!
To run this example, go back to your SBT console. Assuming that it’s still running the ~fastOptJS command from the last tutorial, hit the [Enter] key to stop it. Then issue the reload command to bring in the changes we made to build.sbt:
sbt> reloadThen restart ~fastOptJS:
sbt> ~fastOptJSNow open the hello3.html file in your browser. On macOS you can do this with the open hello3.html command, otherwise your URL for the file will be something like file:///Users/al/ScalaStuff/ScalaJSHelloWorld/hello3.html.
When you do this you should see this result in your browser:
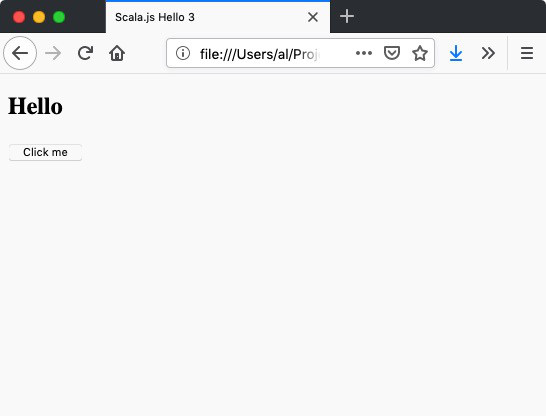
Now click the Click me button, and you should see this result:
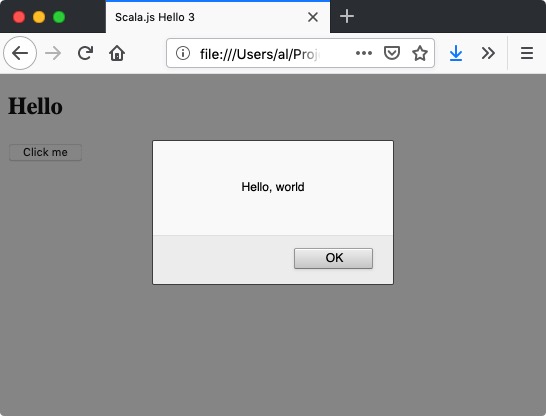
If you followed along, congratulations, you just created a single-page web application with Scala.js!
Summary/Discussion
If you’ve created single-page web applications before, I hope you can see the potential of this approach: It lets you create single-page web apps using Scala.js rather than JavaScript or other languages that compile to JavaScript. This lets you write web applications using an expressive, type-safe language (Scala), with all the usual support you get from using an IDE. If you use Scala on the server-side, Scala.js lets you use the same language and tools for client-side web development.
The Scala.js home page shows the benefits of Scala.js compared to other technologies, so I’ll just show that image here:
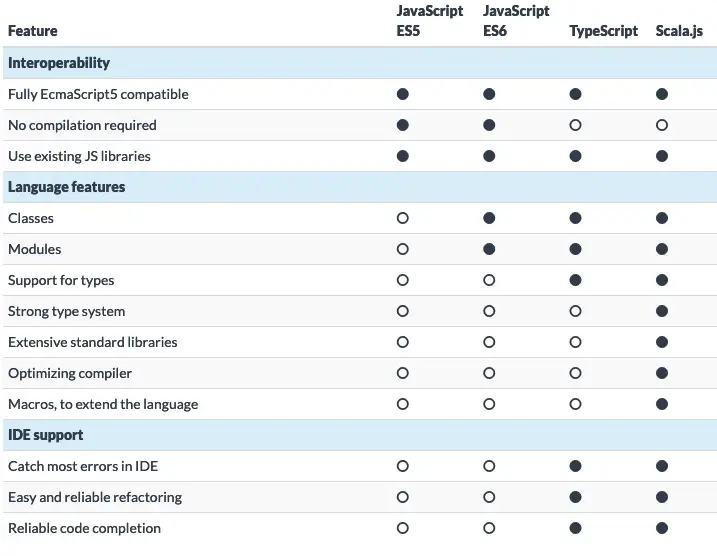
In summary, if you’re interested in working with Scala.js, I hope this three-part introduction to Scala.js has been helpful.
Resources
I used the following resources to cobble together this tutorial:
- lihaoyi.com/scalatags
- github.com/lihaoyi/scalatags/blob/master/example/src/example/ScalaJSExample.scala
- www.g-widgets.com/2018/05/27/introduction-to-scalatags-in-scala-js/
- www.scala-js.org/doc/semantics.html
A problem with getting started with Scala.js today is a lack of documentation, hence these tutorials. If you create something new with Scala.js I encourage you to share your work online so others can learn about it!
More facades
If you want to create your own SPAs using Scala.js, it’s important to note that there are other Scala.js facade libraries for JavaScript libraries such as React, Angular, and more. See scala-js.org/libraries/facades.html for links to those libraries.
Other tutorials in this series
If you want to look back at the first tutorials in this series, here are links to them:
Reporting live today from Louisville, Colorado, this is Alvin Alexander.
| this post is sponsored by my books: | |||
 #1 New Release |
 FP Best Seller |
 Learn Scala 3 |
 Learn FP Fast |
Bonus!
If you’re interested in doing more, here’s another Scala.js single-page application (SPA) example. I won’t discuss this at all — at least not today — but with this source code and the following image, I hope you’ll be able to see what’s going on. First, here’s the source code:
import org.scalajs.dom
import dom.document
import scalatags.JsDom.all._
import scala.scalajs.js.annotation.JSExportTopLevel

object Hello4 {

    def main(args: Array[String]): Unit = {

        // hrefs
        val link1 = a(href:="#", onclick:="handleClick(1)")(p("Page 1"))
        val link2 = a(href:="#", onclick:="handleClick(2)")(p("Page 2"))
        val link3 = a(href:="#", onclick:="handleClick(3)")(p("Page 3"))

        // should handle this style with a css page, not here
        val listOfLinks = ul(
            li(link1, style:="display: inline;"),
            li(link2, style:="display: inline;"),
            li(link3, style:="display: inline;")
        )

        val content =
            div(id := "main-div",
                h1(style:= "color: blue;", "Page 1"),
                listOfLinks
            )

        val root = dom.document.getElementById("root")
        root.innerHTML = ""
        root.appendChild(content.render)

    }

    @JSExportTopLevel("handleClick")
    def gotAClick(i: Int): Unit = {
        val s = s"gotAClick called with $i"
        dom.window.alert(s)
        //println(s)
    }

}
The big thing to know — something I didn’t cover in the first three tutorials — is that the @JSExportTopLevel("handleClick") annotation lets you call the Scala method named gotAClick with the name handleClick from an HTML page. That is, from the perspective of your HTML page, you can call a JavaScript function named handleClick. I’m out of time for tonight, so see if you can figure out what I mean from the following image:
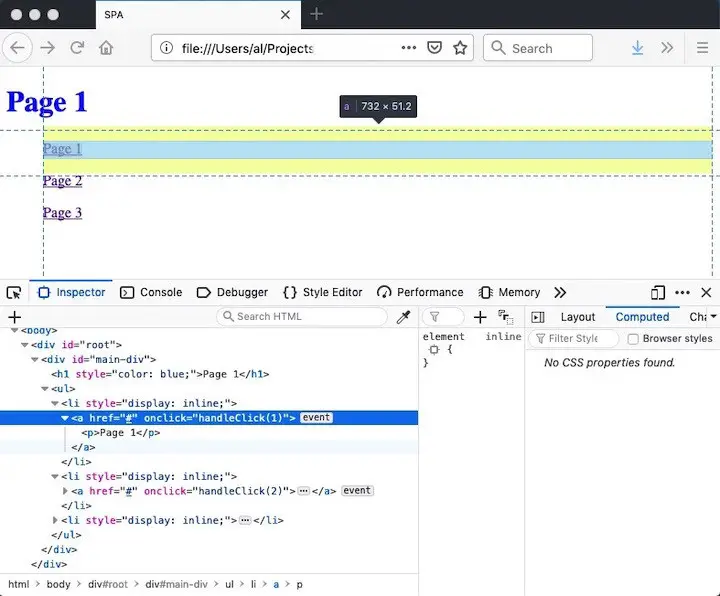
For tonight, I hope that source code and what you see in that image is enough to help you understand this example. As before, create this source code file as Hello4.scala, copy hello3.html to hello4.html (no changes are needed), update build.sbt as needed, then open hello4.html in your browser. And have fun!
Source code
All of the source code for this Scala.js tutorial series can be found here:
books by alvin
|
|
|
|