


Checking the module back out of CVSOkay, we've achieved success in getting our module stored in a CVS repository, but don't go running away just yet - this next step is where most people make the big mistake. At this point most people keep working in their old directory (which for me is "C:AlDDProjectsWinCVS-CreateAModule") and then wonder why WinCVS doesn't see this as a CVS module, and wonder why all their WinCVS commands fail so miserably. The reason for this is that this old directory is not a CVS sandbox. Maybe it's a bit of an awkward step, but WinCVS didn't just turn your old directory into a sandbox. Yes, it did create a new module for you, but that module is in the repository (i.e., "c:cvsroot"). What you need to do now is check that module out of CVS, and then begin making all your changes in the directory you actually check back out from CVS. If that sounds awkward or difficult, fear not. If you follow these steps (and trust me for a few moments) everything should work out just fine. Rename your old directoryStep one is to shut down WinCVS. You need to do this because WinCVS has a lock on your current work directory, and you're about to rename that directory. Windows Explorer won't let you do that while WinCVS has this lock, so ... shut down WinCVS for a moment. Step two is to go to the Windows Explorer, and rename your work directory, i.e., the one you just imported into the CVS repository. Again, my work directory is named "C:AlDDProjectsWinCVS-CreateAModule", and I'm going to rename it to "C:AlDDProjectsWinCVS-CreateAModule.old" (just adding ".old" to the original name). (Note: This step isn't technically necessary, I'm just trying to reinforce the idea that you don't want to use this old directory any more.)
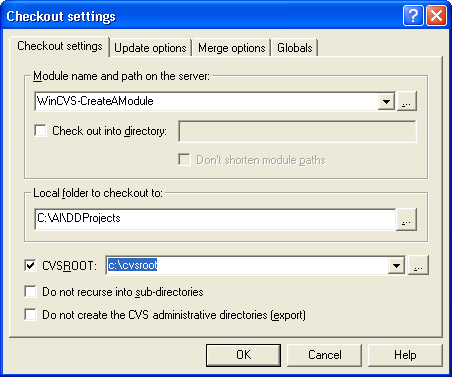
Check out your moduleOnce you've done that, you can check your module out of the CVS repository with WinCVS. Start WinCVS, and in the folders view on the left side of WinCVS, click the folder you want your module to be checked into. For my purposes I want to put it right back in the old location, i.e., "C:AlDDProjects". Next, right-click that folder name, and choose the "Checkout module..." menu item from the popup menu. This brings up a "Checkout settings" dialog, as shown in Figure 9. If it is not already pre-populated, enter the name of your module in the "Module name and path on the server" text field. My module name is "WinCVS-CreateAModule", so I enter it here. The "Local folder to checkout to" is set to "C:AlDDProjects", and I enter the "c:cvsroot" in the CVSROOT textfield. You can look at the other tabs in this dialog, but I normally don't change anything, especially for a first checkout. (The one exception is in the Globals tab, where I uncheck the "Prune empty directories" checkbox. This isn't necessary for my simple example, but if someone else happened to create the module first, I may not know if they created it with any empty directories.) Next, I click the OK button, and WinCVS goes to work, eventually giving me the following message in the WinCVS output panel:
cvs -d c:\cvsroot checkout -- WinCVS-CreateAModule (in directory C:\Al\DDProjects)
cvs checkout: cwd\texttt{C:\Al\DDProjects ,current}C:\Al\DDProjects
cvs checkout: Updating WinCVS-CreateAModule
U WinCVS-CreateAModule/#CreateANewModule.tex#
U WinCVS-CreateAModule/CreateANewModule.tex
U WinCVS-CreateAModule/CreateANewModule.tex~

\textbf{*}\textbf{* CVS exited normally with code 0 }\textbf{*}*
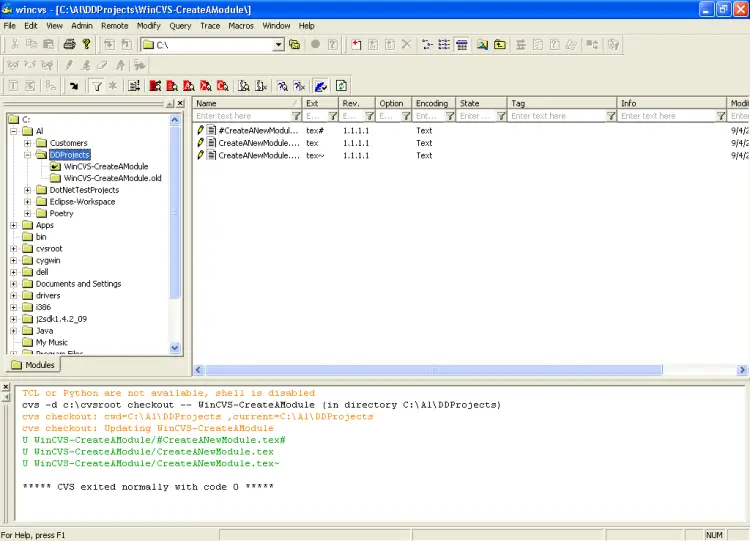
Everything looks successful, and magically I can see my files in WinCVS. A copy of the files have been checked out of the CVS repository and placed in the directory I selected. This is shown in Figure 10.
Windows Explorer and the magic CVS folderIf I now look at my directory from Windows Explorer everything looks as expected. My "WinCVS-CreateAModule" is restored, and it now contains the magic CVS subdirectory. If you're not familiar with CVS, a word of caution: Don't touch that CVS directory. Leave it there, don't delete it, don't rename it. You'll see one of these CVS folders in every subdirectory of the project you just checked out, and again, don't touch any of them, CVS needs them to work properly. |