Table of Contents
- Goals
- Backup your database
- Check my code out of Github, or create a module directory
- Create a project info YAML file
- Create the necessary subdirectories
- Write the code to display your block
- Clear the caches
- Enable the module
- Place the block module
- See the custom block on your website
- The biggest problem I encountered
- The source code
- Summary
In this tutorial I’ll demonstrate how to write a simple Drupal 8 “block module.” By this I mean that I’ll show you how to write a simple Drupal 8 module that will display output in a block. When you’re done you will have created a new block that you can place in one or more theme regions.
Note: I tested the code in this tutorial with Drupal 8.1.3.
Goals
It’s important to state up front that the main goal of this tutorial is to help you write a simple Drupal 8 “block module” that you can get up and running in less than fifteen minutes or so.
Because of that main goal, a secondary goal is that I’m not going to spend time explaining each step in great detail. I will provide more explanation of everything in a second tutorial, but not here. The goal here is to get you up and running fast, and if you already know a fair amount about Drupal programming, I suspect that you can take it from here without needing those nitty-gritty details.
Backup your database
I recommend backing up your Drupal 8 database before starting. This is because when I created my first block module it kept failing at a certain point (that I’ll discuss below). In the process of debugging the problem I uninstalled the module and cleared my caches with drush cr, but then when I looked at the database I found that my module name was still in two database tables. (Because that module name was “Skyad” it was easy to find.)
Therefore, please backup your Drupal 8 database before starting.
Check my code out of Github, or create a module directory
The next step is to move into the modules directory of your Drupal 8 website. At this point you can either clone my Github project — which you’ll find at github.com/alvinj/foobarblk — or else create a directory here named foobarblk.
I’m choosing a slightly unusual name for this project so that in case you run into any problems, you can debug it a little more easily.
Create a project info YAML file
Next, move into the foobarblk directory and create a file named foobarblk.info.yml. This is going to be an “info” file for your module.
Edit the file and add these contents to it:
name: Foobar Block
type: module
description: 'This is an example Drupal 8 Block Module'
package: Custom
version: 8.x
core: 8.x
dependencies:
  - node
  - block
I need to research this a bit more, but I think those are the basic fields needed for a custom block module.
A more accurate way to say it is that I know that this configuration works. When I used a smaller configuration file based on what I read on the drupal.org website my module did not work. That’s why I need to research this more.
Save that file, and move on to the next step.
Create the necessary subdirectories
Next, the way Drupal 8 works, you need to place your custom source code in a directory structure that Drupal looks for. So, within your foobarblk directory, follow these steps:
- Create a subdirectory named src
- Move into that directory (
cdinto it) - In that directory create a subdirectory named Plugin
- Move into that directory and create a subdirectory named Block
At this point your module directory structure should look like this:
$DRUPAL8_ROOT/modules/foobarblk/src/Plugin/Block
This is another way to show the directories in the current project structure:
modules/foobarblk
modules/foobarblk/src
modules/foobarblk/src/Plugin
modules/foobarblk/src/Plugin/Block
Write the code to display your block
The next thing to do is write the PHP code that will generate the output for your block. To do this, move into the src/Plugin/Block directory, then create a file named FoobarblkBlock.php in that directory. Put the following contents into that file:
<?php

/**
 * @file
 */
namespace Drupal\foobarblk\Plugin\Block;

use Drupal\Core\Block\BlockBase;

/**
 * Creates a 'Foobar' Block
 * @Block(
 * id = "block_foobarblk",
 * admin_label = @Translation("Foo Bar block"),
 * )
 */
class FoobarblkBlock extends BlockBase {

    /**
     * {@inheritdoc}
     */
    public function build() {
        return array (
            '#type' => 'markup',
            '#markup' => '<h2>Foo Bar</h2>',
        );
    }

}
Of course there’s more to say about this code, but for now, just place this code in that file.
That’s all the code you have to write for a simple “Hello, world” module.
Clear the caches
Next, clear your Drupal 8 caches. To do this I use this Drush command:
drush cr
If you don’t currently use Drush, I highly recommend using it, or the Drupal Console.
Enable the module
Next, you need to enable the module you just created. To do this, click the “Extend” menu item, or go to the admin/modules URI. On this page, scroll down until you see the “Foobar Block” module. It should look something like this:

Click that checkbox, then scroll down and click the “Install” button at the bottom of this page.
Place the block module
Next, click the “Structure” menu item, then click “Block layout.” This will take you to the admin/structure/block URI.
Under the “Block layout” tab, click the name of your website theme to select it.
On my computer I am using the default Bartik theme, and I’m about to place my block in the “Sidebar first” region.
Then scroll down to the region where you want to place your new block, and click the “Place Block” button in that region. This will display a “Place block” popup window.
In this window, click the text field that shows the “Filter by block name” help text, then type “foo.” When you do this the results area will be reduced to showing just the following output:
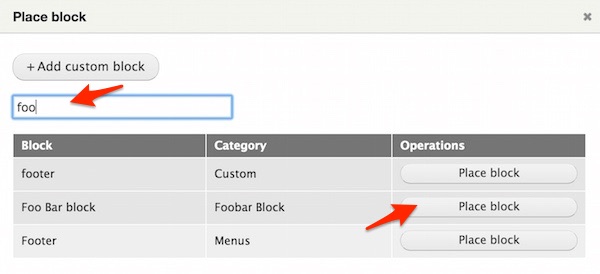
On this window, click the “Place block” button on the “Foo Bar block” row. This will display a “Configure block” window that looks like this:
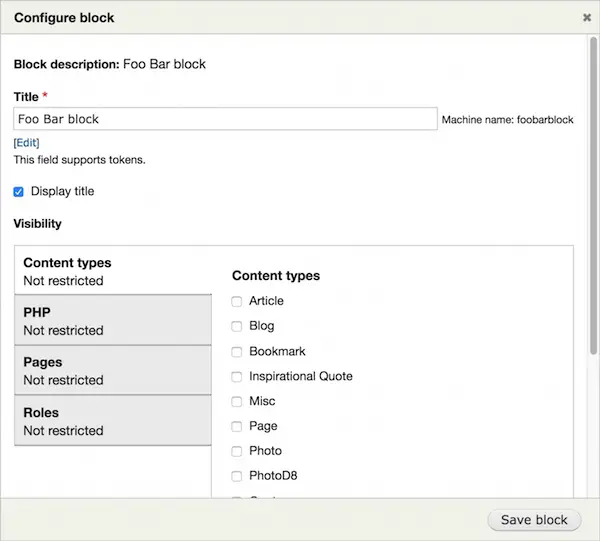
For the purposes of this tutorial, just click the “Save block” button at this time. (If you prefer, you can edit these fields as desired, but if this is your first Drupal 8 block module I recommend keeping things simple.)
See the custom block on your website
At this point — as long as you didn’t change anything on the “Configure block” window — you should see the block on the “Block layout” admin page. I’m using the Bartik theme and I placed the block in the “Sidebar first” region, and this is what the block output looks like:
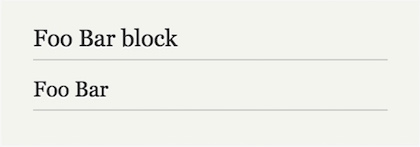
If your block is showing up, congratulations, everything went as planned.
If not, this is where things get tricky ...
The biggest problem I encountered
The biggest problem I ran into is that I did something wrong with my first block module, and when I clicked the “Place block” button on the “Place block” popup window, nothing happened. And I mean nothing.
I didn’t get taken to the “Configure block” window, and I didn’t see any error messages. I had Drupal 8 configured to show me all errors, and I saw no error messages in the display, none in the PHP or Apache log files, and none in the Drupal “Recent log messages” page at admin/reports/dblog.
This is the problem I alluded to at the beginning of this tutorial when I suggested that you make a database backup. I ended up uninstalling my module and clearing all of the caches, but when I then used phpMyAdmin to search the Drupal 8 database, I found that the name of my module was still in two database tables. I assume that this was a problem, so I renamed everything in my module to a different name, and then the new version of the module began working.
The source code
As I mentioned earlier, if you want to take the easy way out and get my source code from Github, you can find it here:
Summary
As I also mentioned up front, I don’t want to get bogged down in the nitty-gritty details of Drupal 8 module programming in this tutorial, so I’m going to end this tutorial here.
If you do want more details on how all of this works, please stay tuned, and I’ll try to take the time to write a second tutorial that goes into detail about how this Drupal 8 “block module” code works.
books by alvin
 |
 |
 |
 |