As a brief note, if you ever need to use the Flutter CupertinoDatePicker — a spinning wheel chooser — in “time-picker/time-chooser” mode, I can confirm that this example works:
child: CupertinoDatePicker(
    mode: CupertinoDatePickerMode.time,
    initialDateTime: DateTime(1969, 1, 1, _timeOfDay.hour, _timeOfDay.minute),
    onDateTimeChanged: (DateTime newDateTime) {
        var newTod = TimeOfDay.fromDateTime(newDateTime);
        _updateTimeFunction(newTod);
    },
    use24hFormat: false,
    minuteInterval: 1,
)
Note that even when you only want to set an initial time value, the CupertinoDatePicker in CupertinoDatePickerMode.time mode requires that you pass it a DateTime value, so I just give it a date/time back in 1969:
initialDateTime: DateTime(1969, 1, 1, _timeOfDay.hour, _timeOfDay.minute),
You can set the year, month, and day to whatever you want; the only important values in CupertinoDatePickerMode.time mode are the hour and minute.
A complete CupertinoDatePicker/CupertinoDatePickerMode example
If it helps to see a complete CupertinoDatePicker/CupertinoDatePickerMode example, here you go:
import 'package:flutter/material.dart';
import 'shared_prefs_helper.dart';
import 'package:flutter/cupertino.dart';

class PreferencesSelectTime extends StatefulWidget {
    String _title;
    TimeOfDay _timeOfDay;
    Function _updateTimeFunction;

    PreferencesSelectTime(this._title, this._timeOfDay, this._updateTimeFunction);

    @override
    PreferencesSelectTimeState createState() => PreferencesSelectTimeState(_title, _timeOfDay, _updateTimeFunction);
}

class PreferencesSelectTimeState extends State<PreferencesSelectTime> {

    String _title;
    TimeOfDay _timeOfDay;
    Function _updateTimeFunction;
    PreferencesSelectTimeState(this._title, this._timeOfDay, this._updateTimeFunction);

    @override
    Widget build(BuildContext context) {

        return Scaffold(
            appBar: AppBar(
                title: Text(_title),
            ),
            body: FutureBuilder<TimeOfDay>(
                future: SharedPreferencesHelper.getStartTime(),
                builder: (BuildContext context, AsyncSnapshot snapshot) {
                    if (snapshot.connectionState == ConnectionState.done) {
                        return Container(
                            height: MediaQuery.of(context).size.height / 4,
                                child: CupertinoDatePicker(
                                    mode: CupertinoDatePickerMode.time,
                                    initialDateTime: DateTime(1969, 1, 1, _timeOfDay.hour, _timeOfDay.minute),
                                    onDateTimeChanged: (DateTime newDateTime) {
                                        var newTod = TimeOfDay.fromDateTime(newDateTime);
                                        _updateTimeFunction(newTod);
                                    },
                                    use24hFormat: false,
                                    minuteInterval: 1,
                                )
                        );
                    } else {
                        return new CircularProgressIndicator();
                    }
                }
            )
        );
    }
}
I call that code from another widget like this:
onTap: () {
    Navigator.push(
        context,
        MaterialPageRoute(builder: (context) => PreferencesSelectTime(
            'Notification Stop Time',
            _stopTime,
            SharedPreferencesHelper.setStopTime
        ))
    );
},
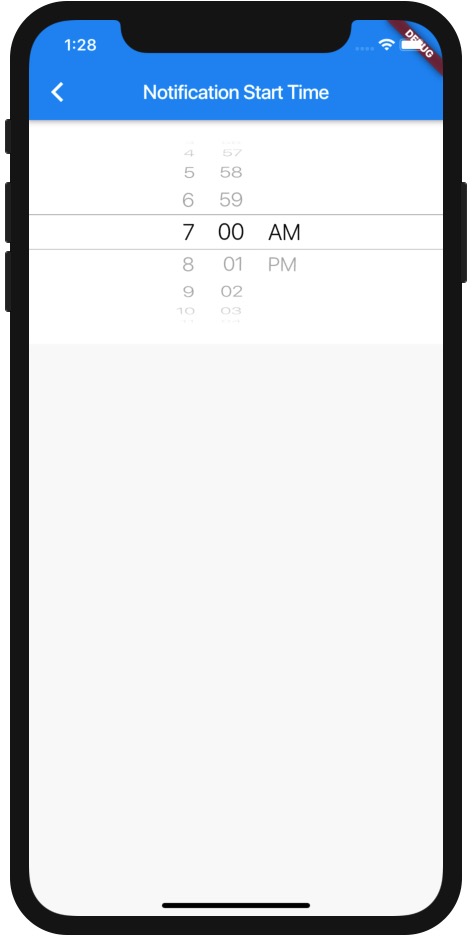
It generates a Flutter screen/widget that looks like this:
Summary
In summary, if you ever want to use the Flutter CupertinoDatePicker in “time picker” mode, I hope this example code is helpful.
books by alvin
 |
 |
 |
 |