Gimp FAQ: How do I draw a circle in Gimp?
Background: Drawing circles with Gimp
I just used Gimp to create several circle images in my iPhone Safari browser privacy and security tutorial, and this is a short tutorial on how I created them. For purposes like that I create hollow circles to highlight something in the original image, so I’ll demonstrate that here, and I’ll also show how to create solid circles in Gimp, which are even easier to create.
Update: I included a video at the end of this tutorial that demonstrates everything I describe in the text that follows.
Solution: How to draw a circle using Gimp
Here are the steps to creating a circle in Gimp, specifically a hollow circle:
- Create a new layer in your image.
- Select the Ellipse tool from the Gimp Toolbox.
- Draw an ellipse/circle where you want it on your image. (Click one spot, drag the mouse to a second spot, and then release it.) I recommend making it just a little bit larger than you think you’ll need it, because the circle border will have a slight width to it. (Hold down the
ShiftandAltkeys while drawing to make a circle rather than an ellipse.) - On the Gimp menu, click the Select menu, then the Border menu item.
- On the Border Selection dialog that comes up, select the pixel width for your circle. (I know that’s not what it says, but that’s what it means.) I generally use two or three pixels. You can also experiment with the “Feather Border” setting to see if you like what it does.
- When you click OK on that dialog, you should now see that your ellipse/circle appears to have a border, with dashed lines making up the inner and outer border edges.
- Make sure the foreground color is set to the color you want.
- Finally, click the Edit menu, and select the “Fill with FG Color” option.
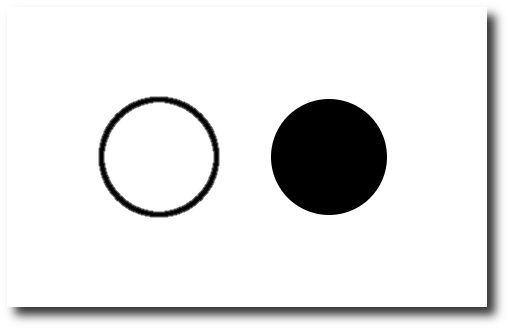
Assuming that all worked, congratulations, that’s how you create a circle with Gimp. Using these steps, you should have created a hollow circle in Gimp that looks like the hollow circle on the left of this image:

As noted in the Comments section below, if in Step 4 of these instructions you jump right to the “Fill with FG Color,” you’ll end up with a completely filled circle, as shown in the right of this image.
Creating an actual circle in Gimp (not an ellipse)
As soon as you start drawing with the Gimp ellipse tool you’ll see that it really wants to create an ellipse, and not a circle. To create a circle in Gimp, hold down the [Shift] and [Alt] keys as you drag the mouse, and you’ll see that it creates an actual circle.
About that Gimp layer
Note that it’s not 100% required that you create a new layer to draw your circle on, but, layers are good things, and the sooner you get used to working with them, the sooner you’ll be a better Gimp user.
Video
I created this short (two minutes, thirty seconds) Gimp video to demonstrate the steps described above:
Summary
I hope this tutorial on how to create a circle in Gimp has been helpful.


