As I was writing the Scala Cookbook, 2nd Edition — and debating writing a book about Scala.js — I had to start thinking about how to implement Scala.js applications in the real world. When I did that, I began to look at these Scala.js libraries:
As I tried to work with those libraries, I coudn’t find any simple “Hello, world” examples for any of them, so as a result I’ve started to create those myself. In this article I share a Slinky “Hello, world” tutorial, using sbt as the build tool. If you’re comfortable with Scala 2, sbt, HTML, JavaScript, and Facebook’s React library, you should be able to understand this tutorial.
In regards to the first steps of this tutorial, if you’re already comfortable with Scala, sbt, and Scala.js, and just want to learn how to use Slinky, skip the next section and go on to the “Getting started” section.
Background
As a brief bit of background:
- This tutorial uses Scala 2. (Scala 3 was just released, but I wanted to keep this tutorial as simple as possible.)
- Combined with the sbt build tool, Scala.js lets you write Scala code that can be compile/transpiled to JavaScript. For instance, when you write a Scala class like this:
object Main extends App {
    println("Hello, world")
}
you can compile that class to a JavaScript file with a sbt/Scala.js command, and then include that file in an HTML document. When you do so, the resulting JavaScript code prints “Hello, world” to your browser console.
- Slinky is a library that’s build on top of Scala.js, and it mimics the React.js platform. From its documentation, “Slinky has a strong focus on mirroring the ES6 API. This means that any documentation or examples for ES6 React can be easily applied to your Scala code ... Just write React apps like you would in any other language!”
Getting started with Slinky
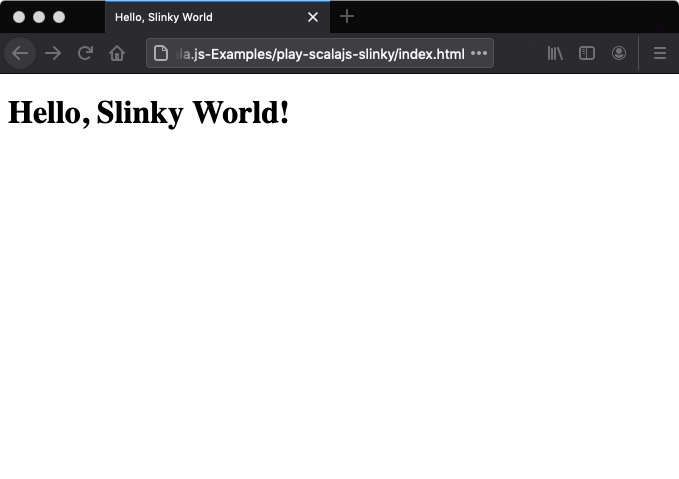
In this short tutorial I’ll demonstrate how to create a Slinky “Hello, world” example. When you’re finished, you should see a result like the following in your browser:
If you want to follow along, you can download the source code for this tutorial here:
A typical sbt project
As the first step, create a sbt project as usual, such as with sbt new or my sbtmkdirs command. The complete project will contain these files:
- project/build.properties
- project/plugins.sbt
- build.sbt
- A Scala/Scala.js source code file
- An HTML file
The first three files are sbt files, and the last two files contain the Scala and HTML source code for our project.
project/build.properties
The project/build.properties file identifies the sbt version that is used for this project:
sbt.version=1.5.1
project/plugins.sbt
The project/plugins.sbt file is where we indicate that the Scala.js sbt plugin:
addSbtPlugin("org.scala-js" % "sbt-scalajs" % "1.4.0")

// get more information during initialization
logLevel := Level.Warn
As that link describes, this is plugin “facilitates compiling, running, and testing with Scala.js.” So this plugin lets you transpile your Scala/Scala.js code into JavaScript.
(You might be able to update this to a more modern Scala.js version, but I haven’t tested that yet.)
build.sbt
This is the simplest possible build.sbt file you’ll need to use Scala.js and Slinky (or very close to the simplest):
// automatically reload the build when source changes are detected
Global / onChangedBuildSource := ReloadOnSourceChanges

lazy val root = (project in file(".")).settings(
    name := "hello-slinky",
    scalaVersion := "2.13.4",
    scalacOptions += "-Ymacro-annotations",
    scalaJSUseMainModuleInitializer := true,
    libraryDependencies ++= Seq(
        "org.scala-js" %%% "scalajs-dom" % "1.1.0",
        "me.shadaj" %%% "slinky-core" % "0.6.7",
        "me.shadaj" %%% "slinky-web" % "0.6.7"
    )
).enablePlugins(ScalaJSPlugin)
I think both the slinky-core and slinky-web libraries are required, but I may be wrong about that.
The Scala.js code (SlinkyHelloWorld.scala)
Next, create a file named SlinkyHelloWorld.scala in the src/main/scala/examples directory of your project with these contents:
package examples

import org.scalajs.dom
import slinky.core._
import slinky.web.ReactDOM
import slinky.web.html._

object SlinkyHelloWorld {
    def main(args: Array[String]): Unit = {
        ReactDOM.render(
            h1("Hello, Slinky World!"),
            dom.document.getElementById("root")
        )
    }
}
If you’re comfortable with Scala 2, that looks like normal Scala code that uses third-party libraries, in this case, Slinky and Scala.js.
The ReactDOM.render code is the Slinky/React way to render something in a browser. In this case we’re rendering an HTML H1 tag in your browser. The getElementById("root") tag is the React way to say, “Render this H1 tag in the element that has an id value of "root".” You’ll see where this element is in the HTML file in the next section.
index.html
Finally, create an index.html in the root directory of the project with these contents:
<!DOCTYPE html>

<html lang="en">
<head>
    <meta content="text/html;charset=utf-8" http-equiv="Content-Type">
    <title>Hello, Slinky World</title>
    <!-- React.js libraries -->
    <script src="https://unpkg.com/react@16/umd/react.development.js" crossorigin></script>
    <script src="https://unpkg.com/react-dom@16/umd/react-dom.development.js" crossorigin></script>
</head>
<body>
    <div id="root"></div>
    <script src="./target/scala-2.13/hello-slinky-fastopt.js"></script>
</body>
</html>
A few points about this file:
- It’s all normal HTML.
- The first two
<script>tags include the React.js JavaScript libraries from those internet URLs. There are other ways to include these resources in your project, but this is probably the simplest and most obvious way to include them, so I recommend starting this way. - The
<div id="root">tag is where all of our output will be sent. Notice that theidhas the value of"root", which is what we use as the target in our Scala code. - The final
<script>tag includes our custom code. Our Scala/Scala.js code will be compiled into this JavaScript file named hello-slinky-fastopt.js that’s under the target/scala-2.13 directory. To be clear, I’ll restate that to say that your Scala/Scala.js code is transpiled into the JavaScript code in this file. (Feel free to look at this file when you create it in the step that follows.)
Running the app
With all the files in place, you can now compile/transpile your code. To do this, start sbt in the project’s root directory:
$ sbt

sbt> _
Then inside the sbt shell, run the fastOptJS command. This command is made available from the Scala.js/sbt plugin. Better yet, start it with the ~ before the command so it continuously compiles your source code:
sbt> ~fastOptJS
That command is just like running ~compile or ~run in a “plain old Scala” project.
Assuming that works, you can now open the index.html file in a browser, such as with the open command on macOS:
$ open index.html
When you do so, you should see a result like this in your browser:
Assuming that this worked, congratulations, you just created your first Slinky/Scala.js project.
Gratitude
I was only able to create this project because of these resources that were created by Mark C. Lewis:
books by alvin
 |
 |
 |
 |